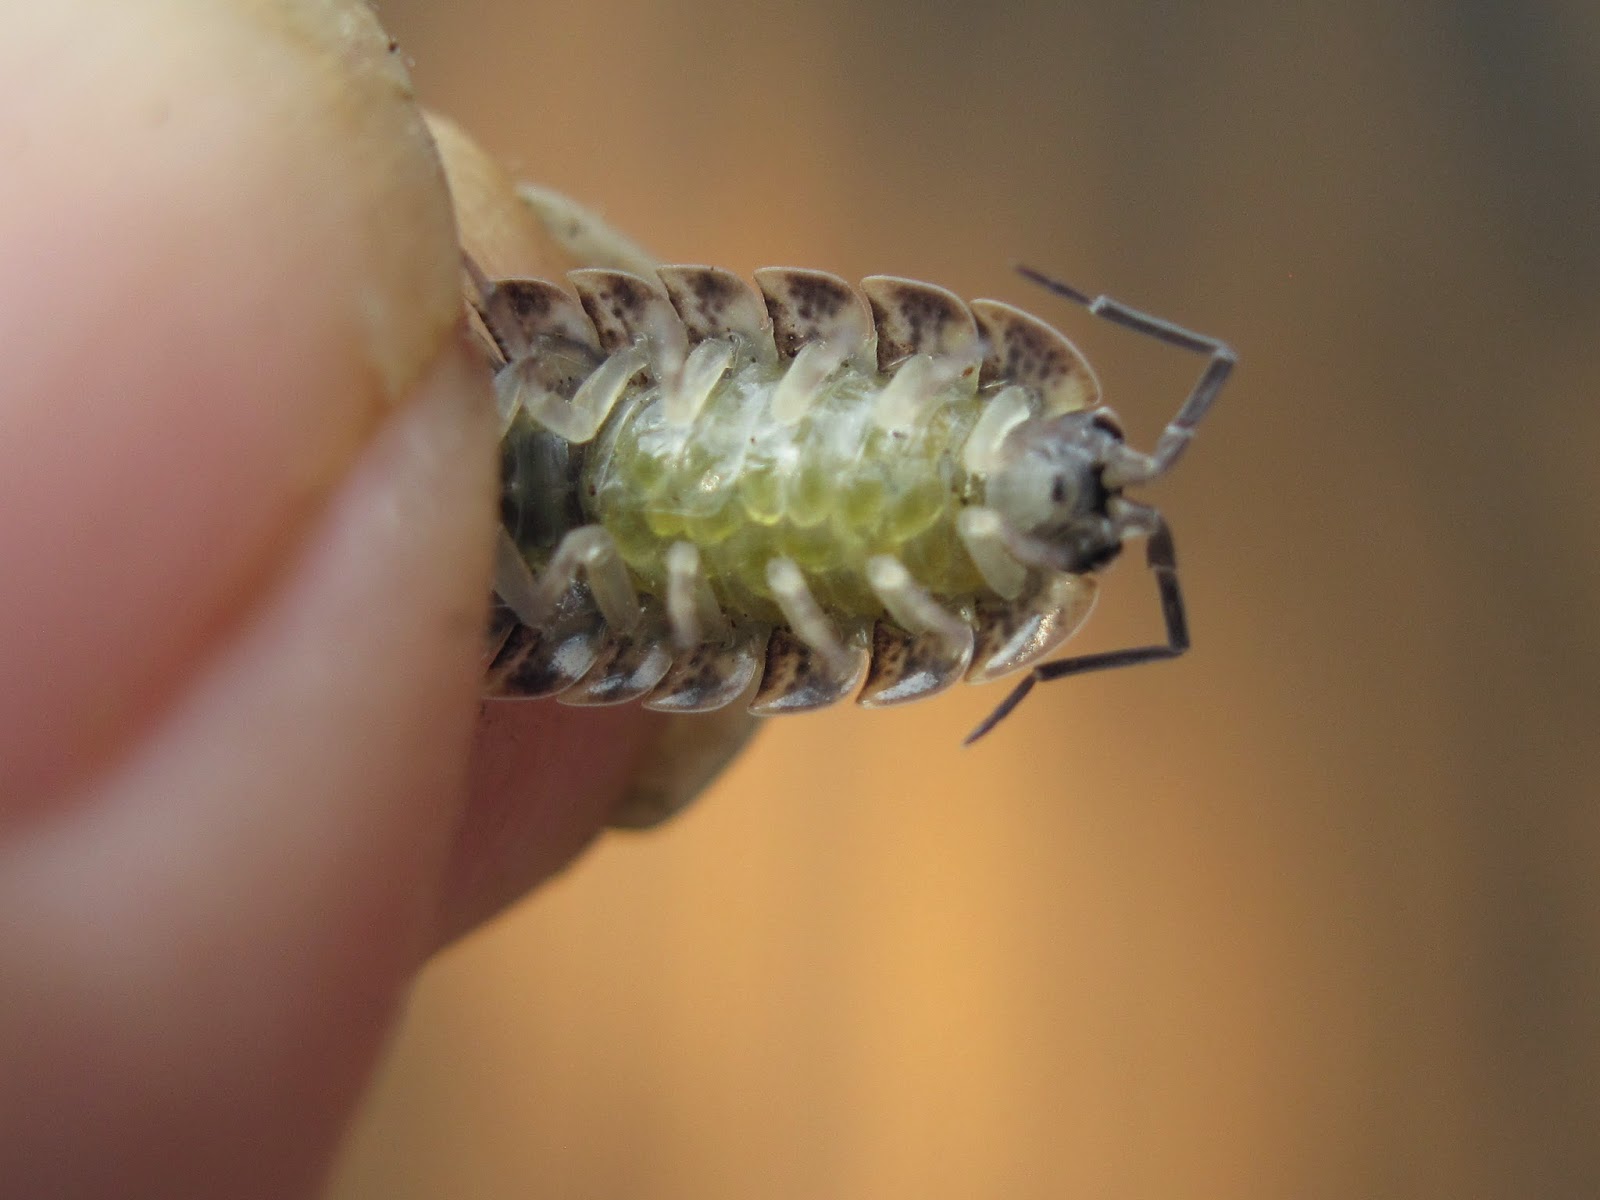
Terrestrial isopods are a high calcium prey item that can make an excellent addition to your feeder rotation. My lizards and frogs all enjoy terrestrial isopods which can be a great treat a couple times a week. The isopods I use are tan sow bugs purchased online at doubleds.org, however you can purchase isopods through various online retailers.
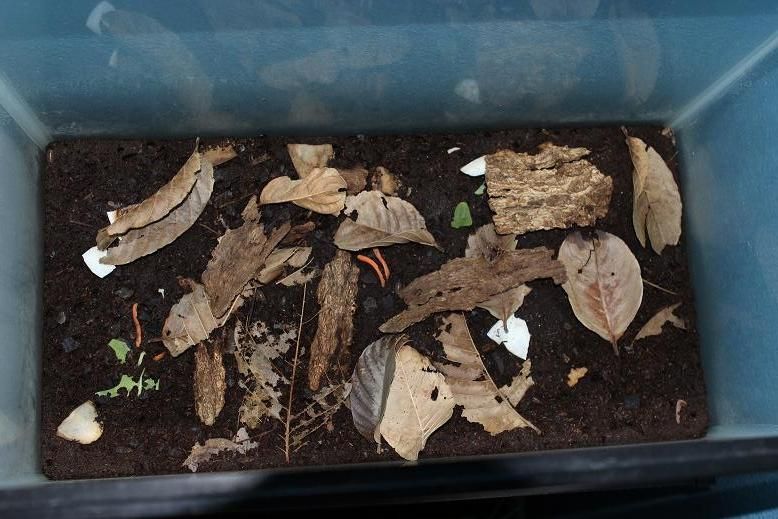
I first set up an aquarium with a mixture of fertilizer free organic soil and play sand. You then want to add plenty of leaf litter and bark chunks for them to hide under and eat as well. They will eat leaf liter and bark as part of their required diet as a source of tanins. You will need to mist the tank daily or every other day depending on the humidity in your area as they breathe through gills and require moist soil to survive. Be careful not to drench the soil as they will drown and die with too much water, but also note that if the soil dries out they will also die from inability to breathe.
Isopods keep their babies in a pouch on the underside of their body where they incubate until ready. Here are a couple of pictures provided by Cheryl Garcia of her isopod with babies in the pouch as well as some babies being born.
Isopods will readily eat various fruits and veggies as well as greens that you would typically offer your feeder insects. They also eat the shed skin of your lizard along with dead members of the colony. I also provide them with plain calcium powder on their food a couple times a week in addition to adding cuttle fish bone to the tank as a calcium source. they require the added calcium to build their shells.
I do not clean out the tank often, maybe every couple months or so. When you want to clean it is best to transfer the isopods over to a new tank. It can take a few days to get them all transferred as the babies are tiny and some may burrow in to the soil. You can add bark and other items for them to cling to and transfer them over daily as they congregate on to the bark.
The dubia roach is a great species to breed and offer as part of your feeder insect options. I began breeding them because I did not like crickets due to their smell and constant chirping. When choosing a roach species to breed dubia's were appealing given their inability to climb smooth surfaces, lack of flying capability and low chance of infesting. I will walk through my set up and care of these nutritious prey.
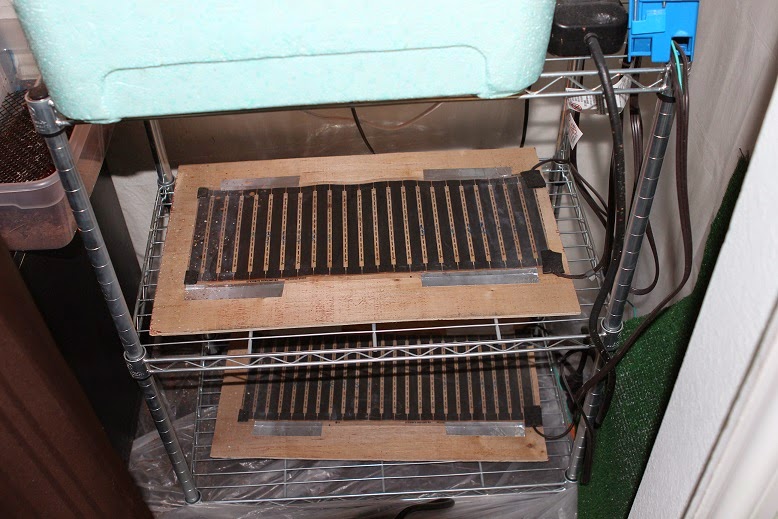
When setting up a dubia roach colony you will not only need to consider housing, but also a heat source. They require a warm and humid environment in order to breed and thrive. I use a rack that is set up with heat mats made of flex watt heat tape. I ordered the flex watt from Incubator Warehouse and followed the following video series to build the heat shelf. I connected the heat tape to a dimmer switch to give me the ability to control the temperature. You can find instructions to fit your needs online and on YouTube.
Here are pictures of my set up.
I use the sterilite 51Qt bins for my roaches. I order cardboard egg flats on ebay in bulk and use them inside the bin for the roaches to live in. I also cut the lid and hot glue screen to it for ventilation.
I leave one corner of the bin open and place a plastic lid in that location for the food. I feed them with various fruits and veggies along with a dry mix that I make myself from various dried fruits, nuts, alfalfa, seeds, rice bran and so on. I feed the colony a healthy diet for their entire life as this ensures they are very healthy when fed to my lizards and frogs. It is also important to rotate the items you are offering for food. I alternate between various greens, fruits, squashes, sweet potato, bell pepper, cucumber and so on.
Many people also use water crystals for hydration, however I do not. I have found that the fruits and veggies offer plenty of moisture and the water crystals are not needed. The fruits and veggies also keep the bin humid enough for the roaches to molt and breed.
I clean out the bin every 2-3 weeks. I find it easiest to have an extra bin ready so that I can just shake the roaches form the old egg flats in to the new bin. While I am cleaning and transferring the roaches over, I will also take this opportunity to separate out the sizes I need for feeding and putting them in smaller critter keepers, making it easy when it is time to feed my pets. I use two critter keepers, one with the size I need for my chameleons and one with the size needed for my frogs. To do this I use a stack of buckets that have holes drilled in them. Each bucket has a different size and they are stacked so that the largest size is on top. This way you can shake your roaches in to the bucket stack and the roaches will trickle down the buckets according to the size hole that they can make it through. The last bucket will have very small hole just big enough for the waste to fall through.
Once the bins are cleaned I will put in the food and let them eat, grow and breed.
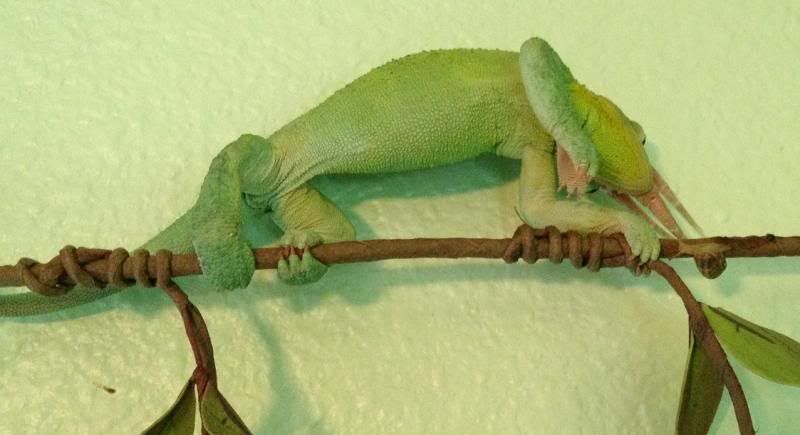
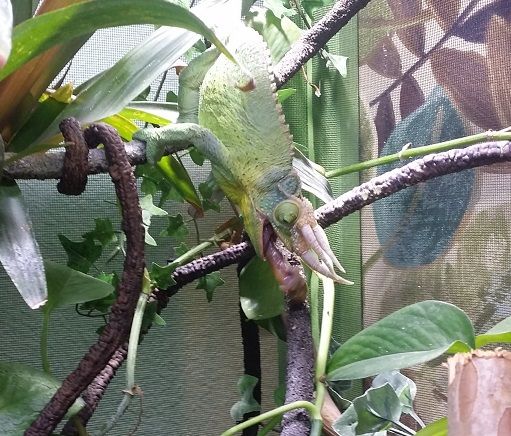
You may be as surprised as I was to find out that some lizards love to eat land snails. I discovered this when I read an article about the Jackson chameleons in Hawaii eating so many tree and land snails that they were concerned about some of the populations. They even went as far as to say that some endangered snail species may be pushed to extinction by the invasive Jackson chameleons.
This lead me to look for a way to start a land snail colony for my chameleons. I purchased my snails from NilesBio, they have reasonable prices, however you need a permit if you live outside of California and these are wild caught snails. Wild caught snails can be used for breeding but should be kept separate from the babies as there is a chance they may carry parasites. I would dig up the eggs weekly and put them in a separate bin to grow for feeding (to be covered later). Snails in the mail is another popular site for purchasing land snails, although more expensive.
The USDA permit was free and not difficult to obtain, however some states may have regulations against importation of land snails given their status as an agricultural pest.
Given that these prey are so high in calcium and moisture, I wanted to provide them as an option for my boys.
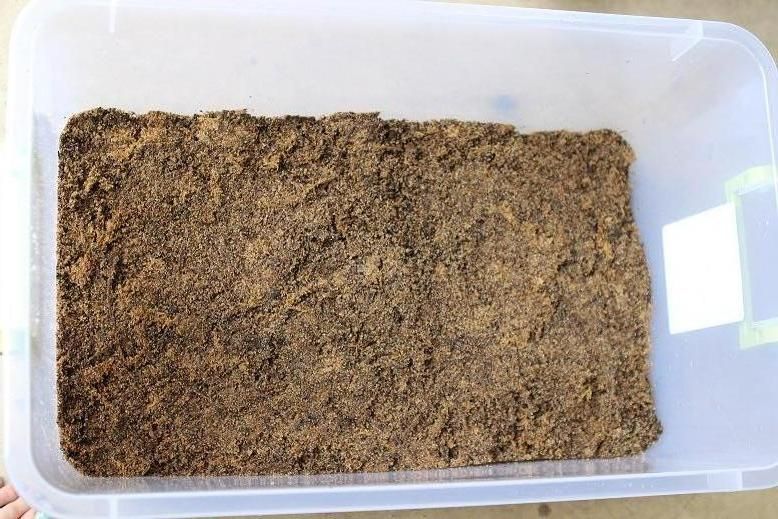
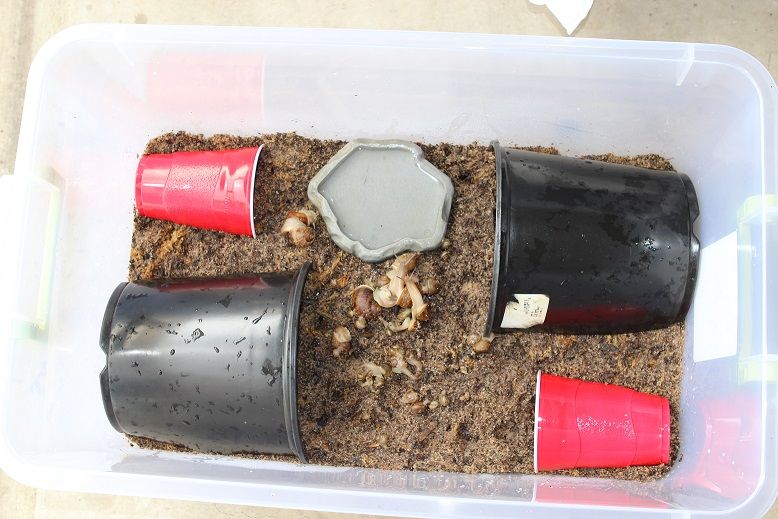
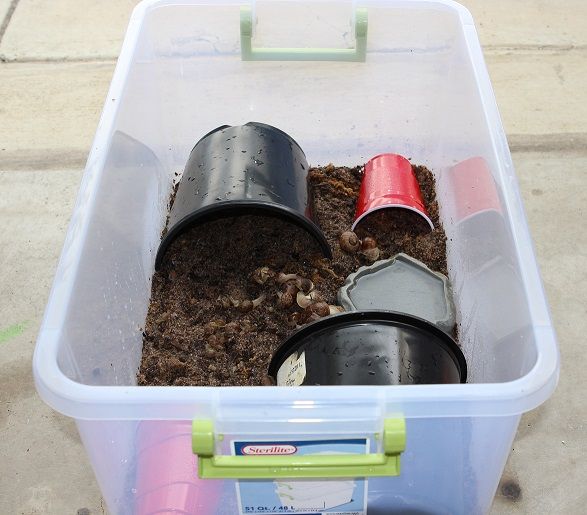
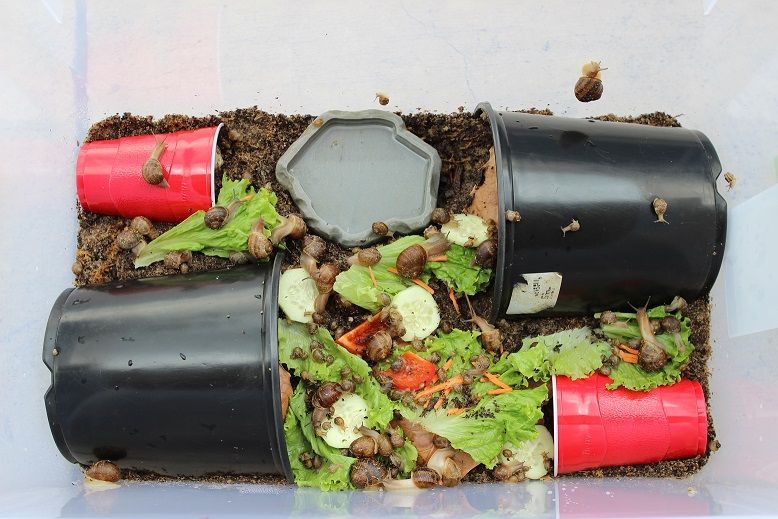
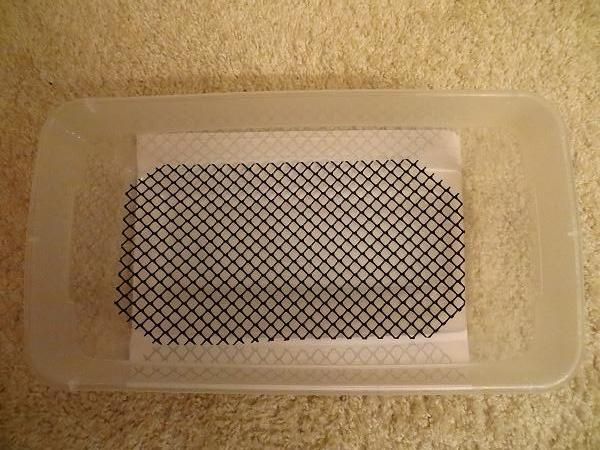
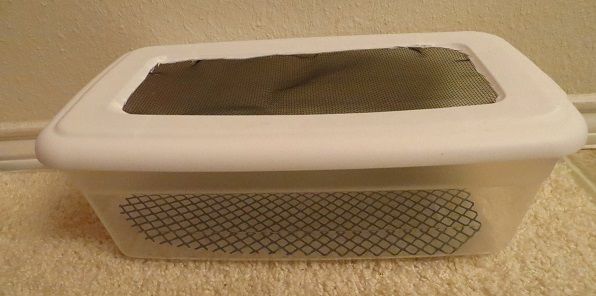
First you will need to set up a home for your land snails. I use a Sterilite 51 Qt as shown below.
You will need to ensure you have at least 2 inches of soil if you want the snails to lay eggs. I use a mixture of equal amounts of fertilizer free top soil and play sand and also add sphagnum moss for moisture.
I then mix the soil together and pat it down gently.
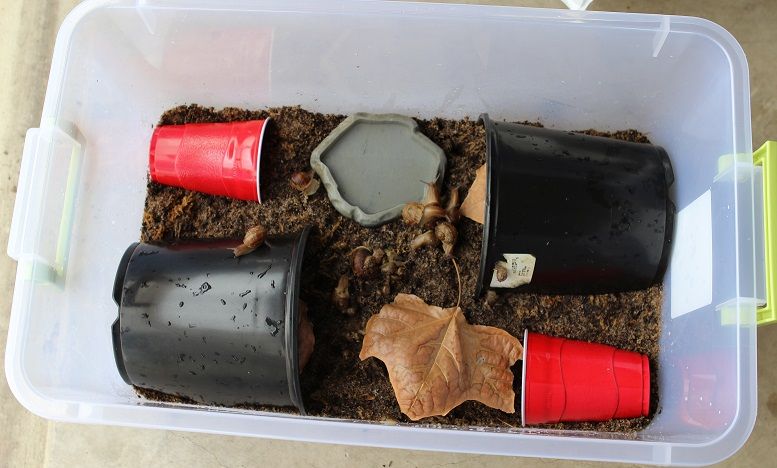
I then spray the soil with water to ensure all is moist. I will also add homes for the snails to hang out in, I use cut in half red solo cups and plastic plant pots as they seem to work well and are inexpensive. I provide a shallow dish with water for them to drink and bathe in as well as some leaf litter.
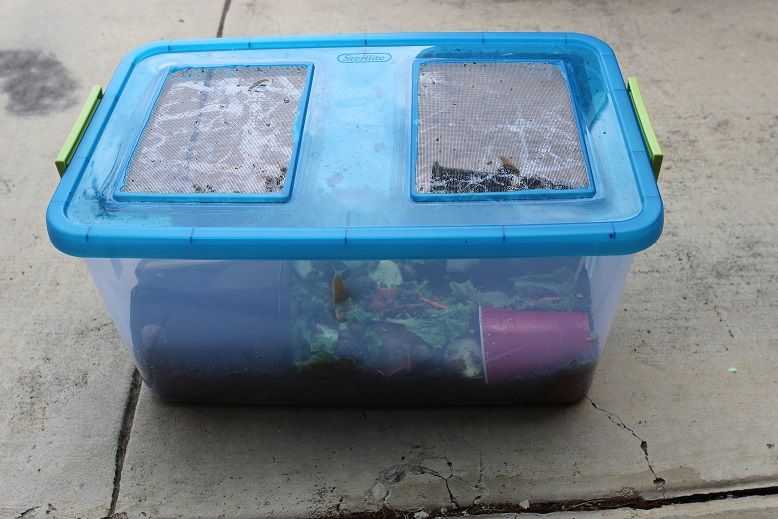
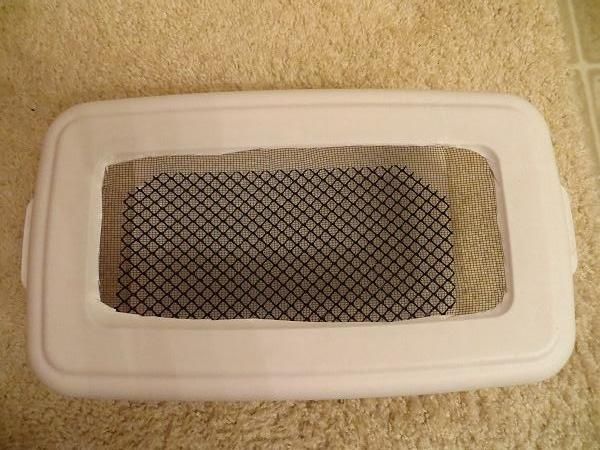
I also cut the lid and hot glue screen to allow for air flow as shown below.
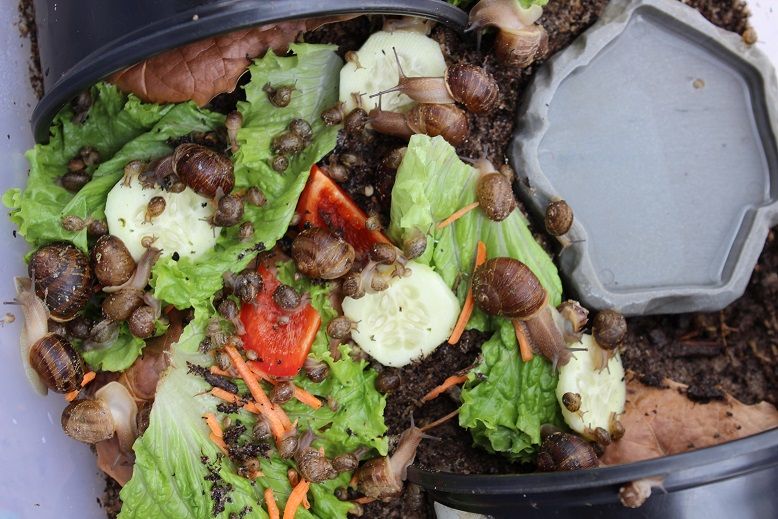
The snails will eat a variety of fruits and veggies. I feed them a variety of greens, lettuce, papaya, mango, cucumber, carrots, red and orange bell pepper, yellow squash, zucchini, butternut squash, sweet potato etc.
I also sprinkle plain calcium on their food every other feeding in addition to providing cuttle fish bone as a calcium source. They require extra calcium to build and repair their shells.
Snails tend to be nocturnal hence, I will mist and feed them in the evening.
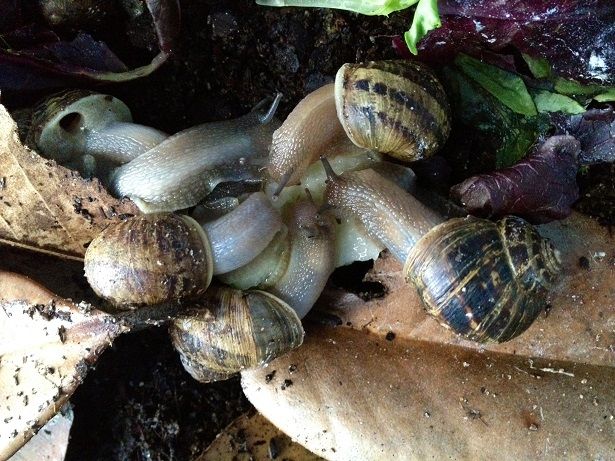
Snails can reproduce alone or with a partner. If you start with more than one snail you may witness breeding which is an interesting process. Snails are hermaphroditic and can take on either sex role or both. They may exhibit courtship behaviors prior to mating and one or more love darts may be shot in to the body of their partner. Their reproductive organs are on their head so you may see them with their heads attached with an appendage between. The love dart is supposed to allow the sperm of the shooter to have a better chance of survival and therefore increase the chance of paternity given that both snails will produce and exchange semen.
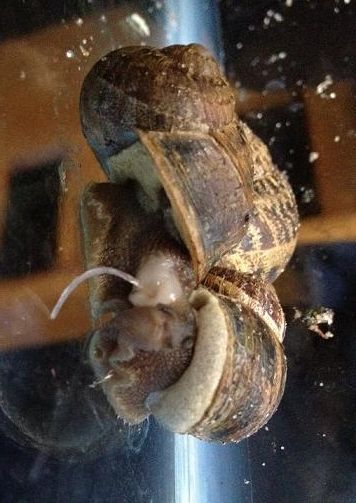
My snails mating with a love dart
After fertilizing the eggs, the snail will burrow in to the soil and lay the eggs. They may burrow all the way in to the soil for some time to complete the process.
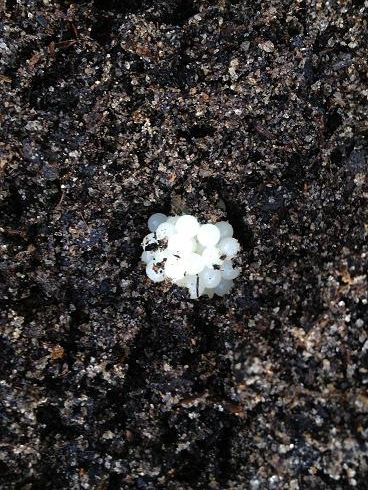
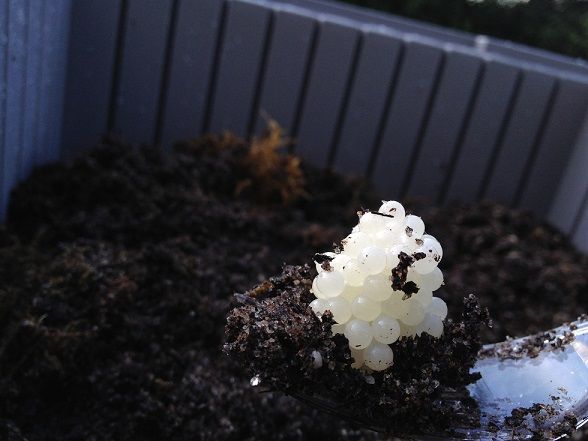
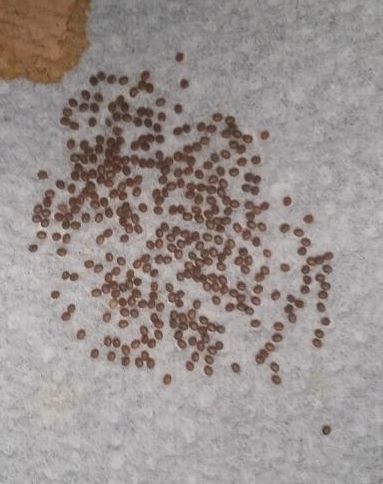
The eggs are white and about the size of bee bees as pictured below.
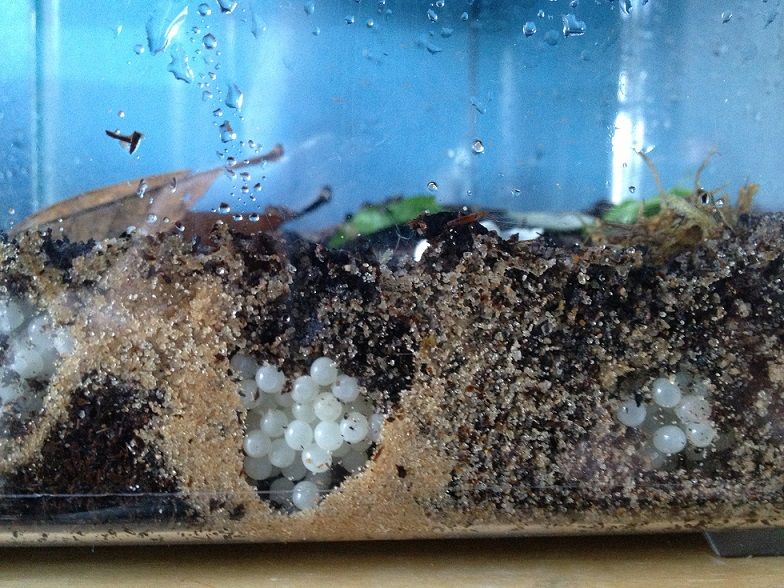
The eggs will take a couple weeks to develop in to baby snails. I like to bury the eggs on the edges of the tank so that i can watch them develop.
I will mist the tank daily and feed them every other day.
I typically clean them every 2-3 weeks as they are very dirty. Some people will just remove the top layer of soil, but I find it easier to just have an extra bin and transfer them over to a fresh bin every couple weeks. I then wash the old bin with soap and water and store it until the next round of cleaning. You want to be sure that you freeze the old dirt prior to discarding it to ensure there are not eggs or snails in it that will go on to infest the environment. They are a serious agricultural pest and must be frozen prior to disposal, this includes any unwanted snails.
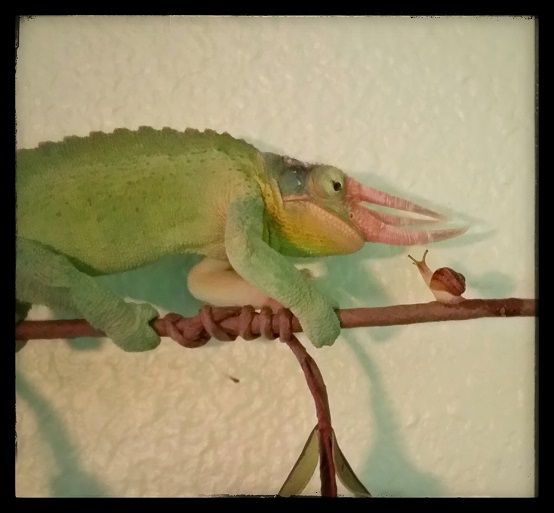
I have also noticed that they will breed more in a clean bin. They do breed pretty fast and will quickly create populations that are far beyond your needs. I know people who have mellers and panther chameleons who will eat snails, but out of my group only my Jackson eats them. He loves them more than any other food item, so I breed all these snails just for him.
1 week worth of snail mess
Snails are one of the easier feeders to breed and totally worth it if you have a pet that will love them. As you can see my Jackson goes nuts for these high calcium, high moisture prey.
I will begin with the silk worm, as most of you will start with worms ordered from various suppliers.
When you receive the silk worms they are typically housed in a deli cup habitat or “pod”. As silkworms have a low immune system you must be very careful with cleanliness and moisture. The pods are not ideal for growing the worms without bacteria or mold; therefore I usually move mine over to separate containers. I use the sterilite 6Qt (5.7 L) Tupperware containers that state they are for shoe storage. Any Tupperware that is around that size should do. I then cut out the lid and hot glue some screen to it as shown below. I also cut some gutter guard (Link to Lowes Gutter Guard) and place that inside for the frass to fall through. You can raise it up with bottle caps or some equivalent.
If the silk worms are kept too humid they may develop mold or bacteria and die, I find that the container noted above works well. I have not had a mass die off to date, that were not related to the silk worm virus.
Note about the silk worm virus: The silk worm virus is airborne and is the reason you will see many suppliers out of stock for long periods of time. If you get hit with the virus you have to clean everything with a bleach and water solution and air out the house. The virus causes the worms to turn in to a nasty dark liquid goo. I have been hit with it twice and was able to overcome it after thorough cleaning and not having silk worms in the house for 2-3 months. If you get the virus with a batch of silkworms and you keep ordering worms before you take necessary precautions to rid your home of the virus, then each shipment that comes in will become infected and die.
Feeding the silk worms can be tricky. If you start them off on mulberry leaves it can be difficult to get them to eat the chow or any alternative later. I tend to use the silkworm chow from mulberry farms or coastal silkworms and also gutload with greens and carrots. You can feed them non-mulberry food; however they will not survive well without some mulberry in their diet (at least 25% or more). If you run out of mulberry chow you can feed them greens and shaved carrots and they will survive temporarily. I have had some who were fed mulberry chow the first half of their life and then fed greens and carrots the second half. They survived until either fed off or cocooned. Those that cocooned did result in healthy moths.
Silkworms get their water from the food so it is not necessary to provide any type of water source.
I usually put enough food in the container to last up to 2 days. After about 2 days the remaining food may be dried and need replacing. I also use this opportunity to empty out any frass from the container. You can lift the gutter guard with worms on top and pour out the frass from the container. Be sure you have thoroughly washed your hands prior to touching the containers, worms, or food.
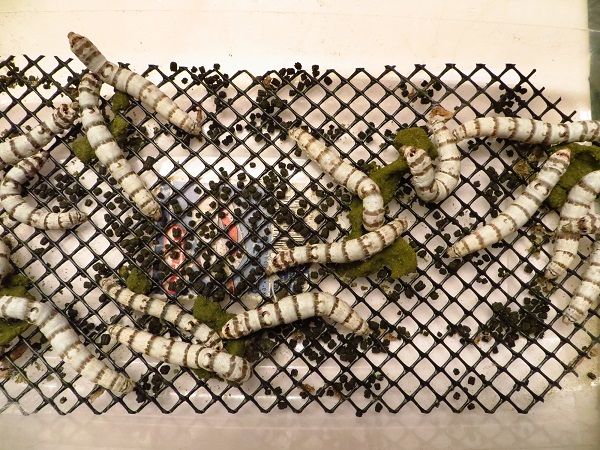
Here are some zebra silks just prior to cleaning the container.
Once the silk worms are full grown it is time to think about allowing them to cocoon. At this point I usually separate the ones I plan to keep for breeding and put them in a larger container that is set up for breeding.
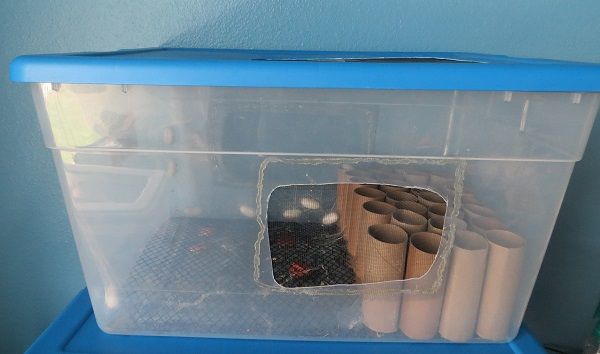
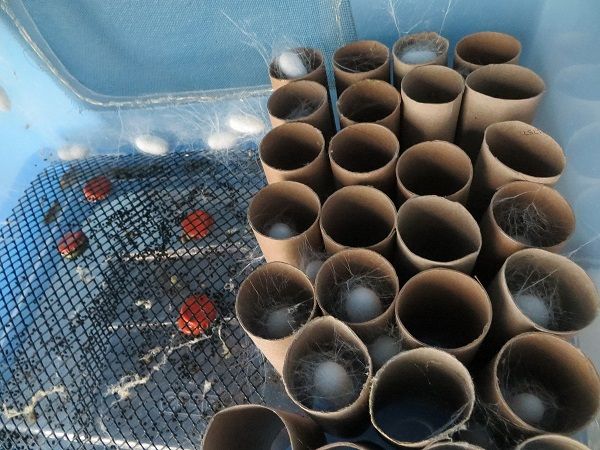
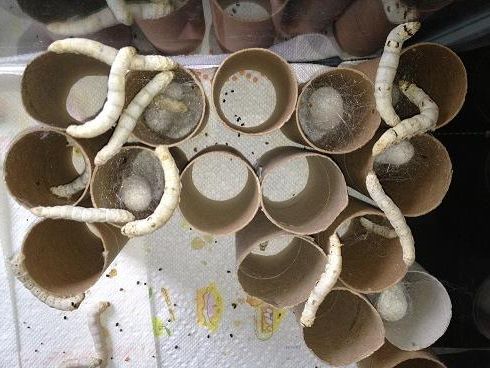
For this stage I use a sterilite 56Qt (53L) plastic tub. I have cut holes in the side and top and hot glued screen as it is used for silkworm breeding and other purposes. I place some gutter guard on one side and toilet paper rolls on the other. I put food on the gutter guard side so that the worms can continue to eat until they are ready to cocoon. Most migrate over to the rolls to cocoon, while others will cocoon just about anywhere.
Once the silk worm begins spinning you must leave it alone. The worm only has a limited amount of silk and if disturbed during the spinning process it may not recover.
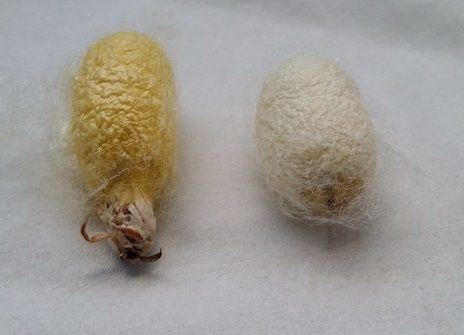
You may also find the occasional yellow cocoon. Do not be alarmed as this is normal. I have read that all silk worm cocoons are yellow in the wild. It is due to selective breeding that they are now white.
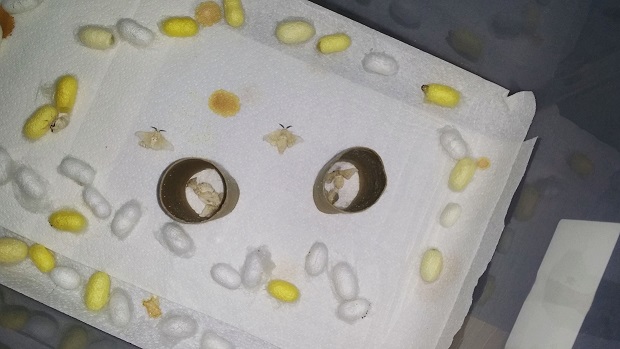
It has been written that moving the cocoons is trouble; however I have moved them every time and not had any issues. I usually wait about a week after they spin cocoons to move them. I gather up all of the cocoons, very carefully, and place them in a new container that is lined with paper towels. I place the cocoons in a circle around the edge of the container and wait for moths to hatch.
Moths will hatch within about 2 weeks, give or take. Just prior to coming out you can see one end of the cocoon becoming wet as the moth squirts cocoonase on the silk to dissolve the cocoon. Once the moth has emerged you will see a hole at the end of the cocoon.
Now that you have silk worm moths you may wonder what to do next.
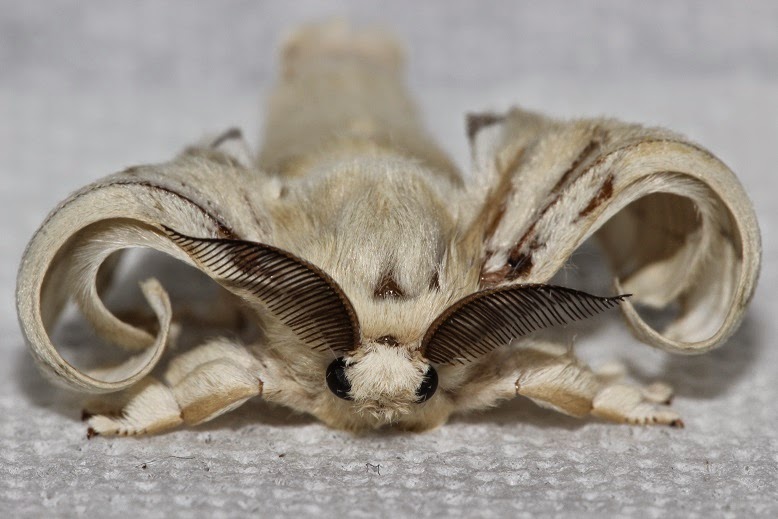
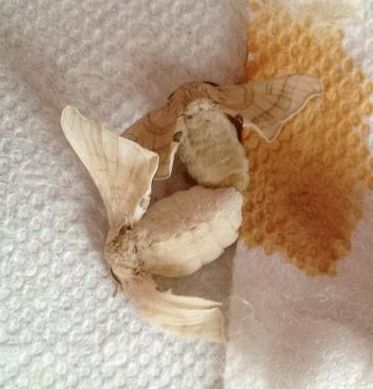
The moths cannot fly and do not eat. They have been bred for silk for thousands of years and the wings have become vestigial. The males tend to be smaller than the females, but with larger wings and antennae. The females will be larger, filled with eggs, and have smaller wings. The females will scent (secrete a pheromone) which drives the males crazy. You will notice dark liquid on the paper which is part of their secretions when excited.
Males can mate multiple times, whereas females mate once. Once a male and female connect they may stay connected for up to 24 hours. You can safely separate them after several hours by gently turning them like removing a key from a lock. You must be careful not to damage the female’s ovipositor as this will affect her ability to lay eggs. Once I separate them (or if you are afraid to separate them just do this to the mating couple) I put a toilet paper roll (you can also use a plastic cup) over her to control the area of egg laying. This will result in a nice circle of eggs that can be cut out later.
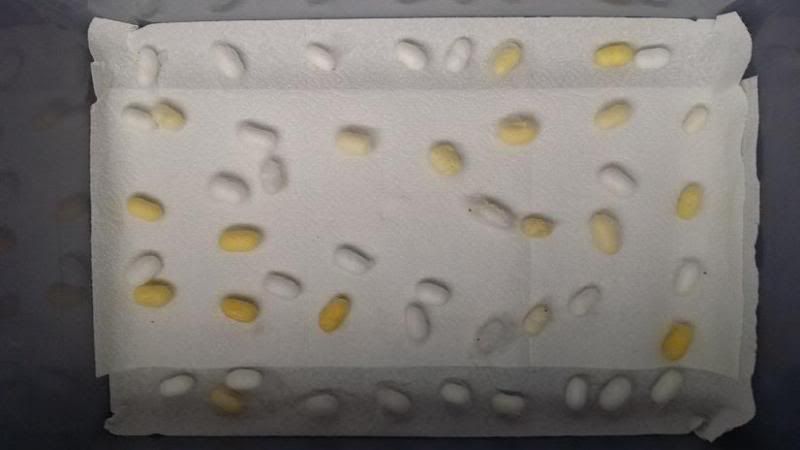
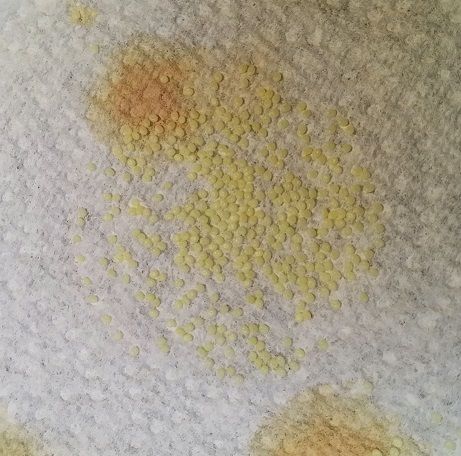
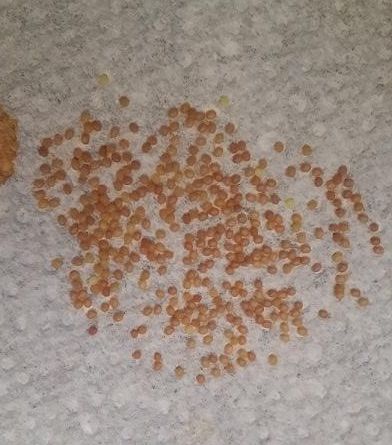
When the eggs are first laid they will be yellow. After several days they will change to tan and then eventually gray. If they do not change color, then they are infertile.
At this point you can leave them at room temp or higher to hatch, or opt to store them for later use. If you would like to store them for later use, you can cut out the egg circles and place them in zip lock bags. I then date the bags and place them in the crisper drawer of the refrigerator until I am ready to hatch them. They will save in the refrigerator for several months. I use an incubator to hatch my eggs that is set to 85 degrees.
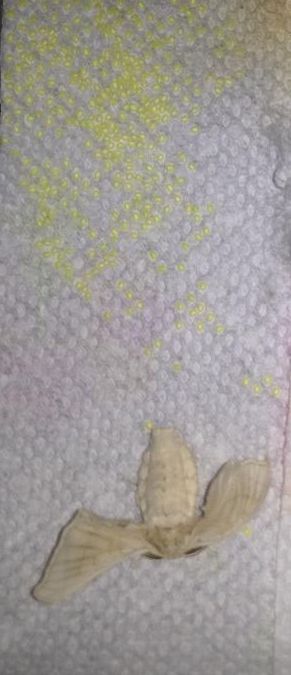
Here is a female with some eggs that were not controlled with toilet paper rolls.
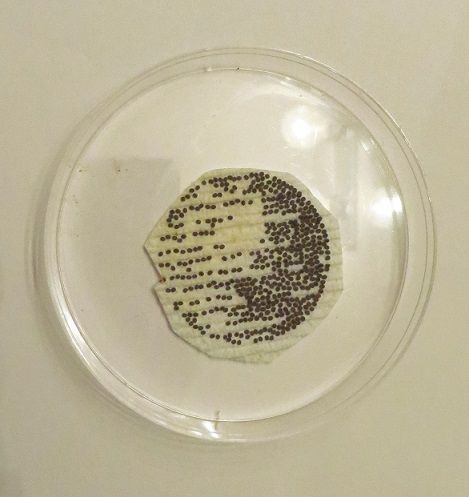
When I am ready to hatch the eggs I place them in to a petri dish.
I keep the petri dish on top of some moist paper towels that I mist daily. The eggs need some moisture, but not enough to cause mold or to come in direct contact with the eggs. I also keep them in my incubator at around 80-85 degrees. At lower temperatures it can take weeks or months for them to hatch. When I tried at room temp with a light bulb above them it took up to 2 months for them to hatch.
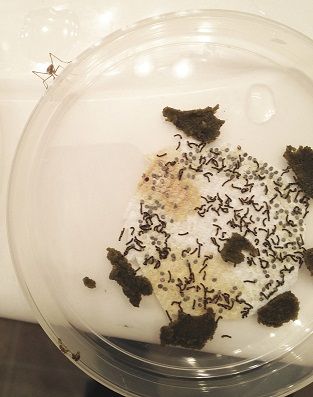
When the eggs hatch you will see tiny black worms, at this time you should put small amounts of food in the container with them. The best results seem to be with using a cheese grater and grating a small amount of food over them. You can remove any dried out food if the worms are not on it.
Don't mind the baby mantis trying to get a silk worm treat.
As the worms grow they will migrate over to the food which is also a good way to get them where you want them. If you need them to move to another spot so that you can clean the other, just put the food where you want them and they will move. It will take a couple weeks for the worms to grow to a decent size, depending on food availability and room temperature. If you would like to slow their growth down, you can deprive them of food. I have read that they can go up to a week without food, although I have not withdrawn food for more than 2 days at a time.
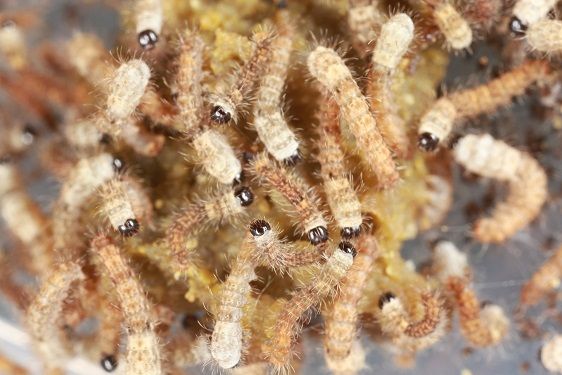
Here is a macro of baby worms.
From here you basically just feed them and clean then and once they grow in to their second instar I move them to the tupperware and start over from the beginning.
So there you have it….my silk worm rearing and breeding methods. I hope this is helpful to you.
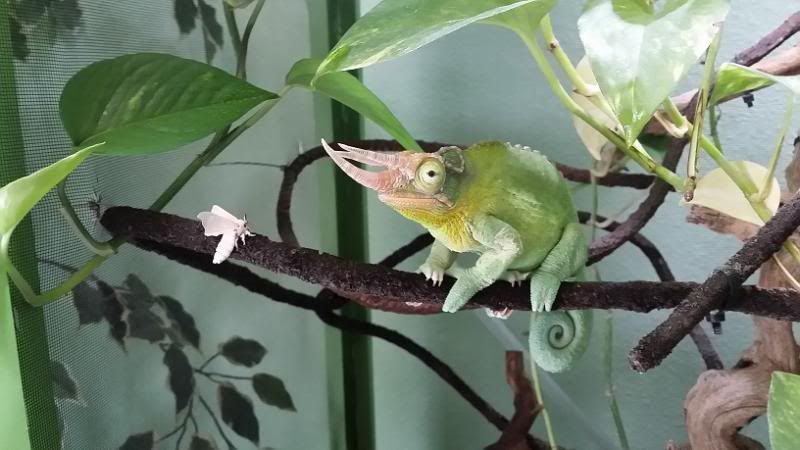
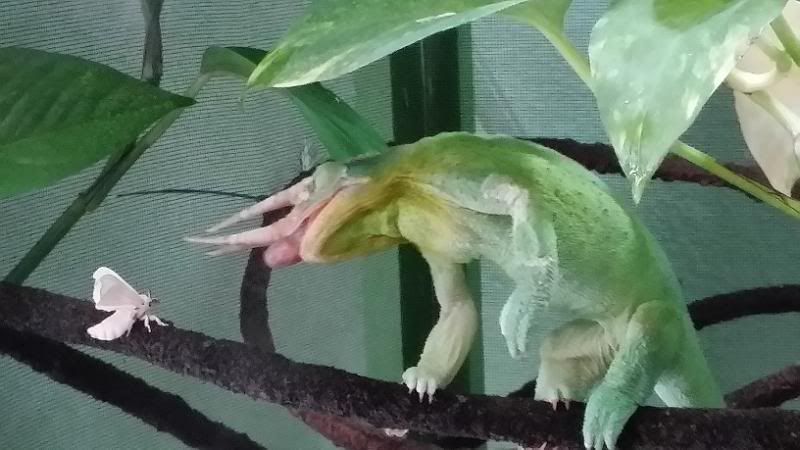
Bonus Pics (my boys love to eat silk worm moths once they are done breeding)